Git Setup for Hugo Blog With Github Pages
This is a short tutorial on how to use Git to manage Hugo blog contents, themes, and generated static files that will be hosted on GitHub Pages.
Initialize the Blog and the GitHub repo
First, you need to initialize a Hugo blog, and enter the site folder:
hugo new site <sitename>
cd <sitename>
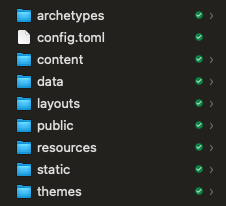
This creates an empty site with name sitename, the site has a structure like this:
Then you initialize a local Git repository in this folder with:
git init
You also need to create an upstream GitHub repo for this local Git repository, and set it as the remote of the local repository, and push everything to the GitHub repo as the first commit.
git remote add origin <url_to_your_GitHub_repo>
git push --set-upstream origin master
Add Hugo Theme
Since the default site does not have any theme, you may want to add a theme from hundreds of themes provided by users of Hugo, which can be browsed here.
Once you chose a theme, in my case, the Mainroad theme, you can add it as a submodule to your blog repo:
git submodule add <url_to_the_theme> themes/<name_of_the_theme>
Adding it as a submodule ensures that the theme is treated as a different project such that Git manages them separately, i.e. changes to the theme won’t affect the working tree of the blog source code, even though the theme folder is within the blog folder.
Optional:
If you want to customize the theme, you can first fork the original theme repo to your own GitHub profile, and add the forked theme as a submodule instead of the original repo. Then you can setup two remotes:
upstreamfor the original theme repooriginfor your forked theme repo
You can then make any changes to the theme locally and push to your theme repo with git push origin master. When there are updates from the original repo upstream, you can pull them with git pull upstream master.
Set up GitHub Pages
Hosting Hugo blogs with GitHub Pages is super easy.
First, you need to create a special repo on GitHub named username.github.io where username is your GitHub username.
Second, add the username.github.io repo as a submodule to your blog folder:
git submodule add <url_to_username.github.io> public
Note the destination has to be the public folder, which you may need to delete first before executing the above command.
The public folder is created by default when you first initialize a blog with Hugo, it stores the generated static files of the site, which can be deployed to any HTTP server, in this case, the GitHub Pages. Using the public folder as a submodule conveniently connects the output of your Hugo blog to the place where is should be deployed. Otherwise, you need to copy paste everything from public folder to your local username.github.io folder everytime when you update your blog, which is boring and inconvenient.
👌 That is it, you are done with all the set-ups! Next, I will show how to write and publish a blog.
Write Blog and Publish
Initialize a new post by:
hugo new <path_to_new_post>
The path_to_new_post will be by default in the content folder, it can be of many file types, but most often, it will be a Markdown file with extention .md.
After writing the post in the new post file, you can generate the site with:
hugo
The updated site will be in the public folder. You can then commit both the source code and static files with:
git add .
git commit -m "commit message"
git push origin master

cd public
git add --all .
git commit -m "commit message"
git push origin master
That is it. You should now see the updated site at username.github.io.